
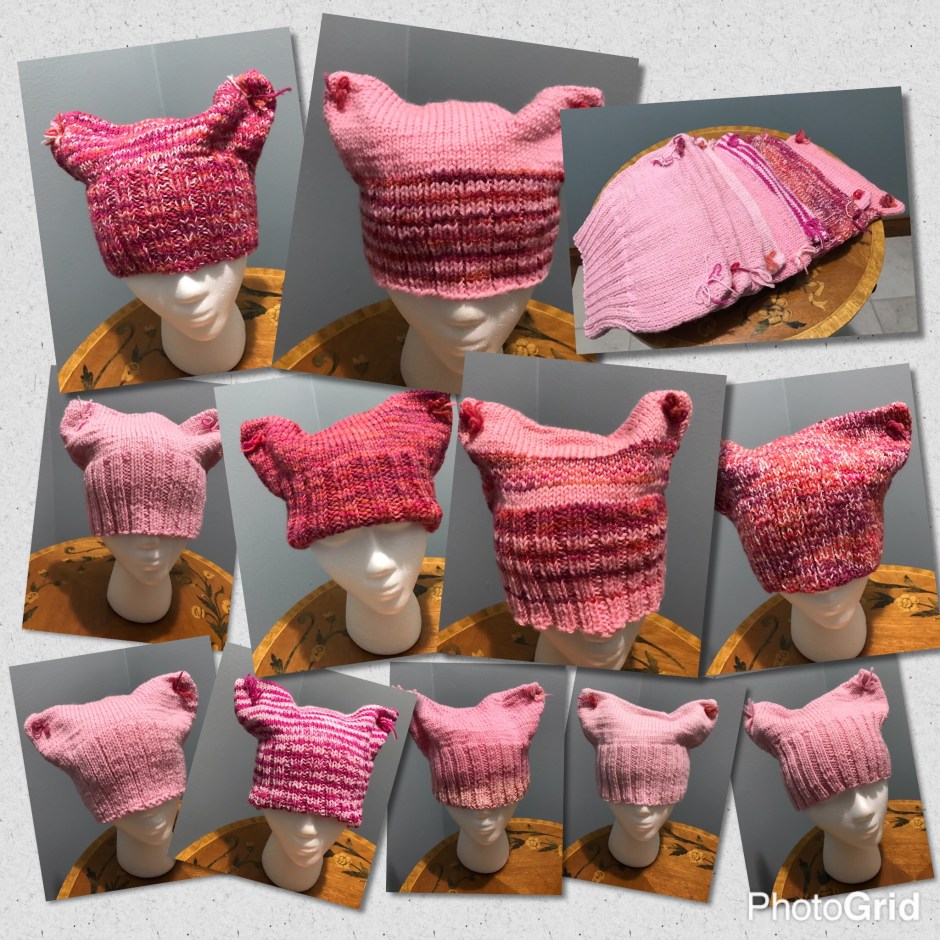
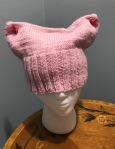
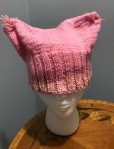
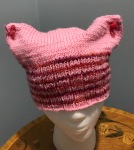
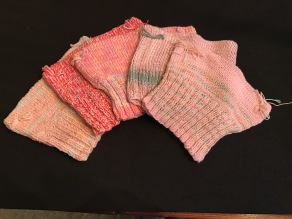
Recently I participated, to the tune of 20 hats, in The Pussyhat Project. Repetition freed my mind to consider the various different steps. In making the same pattern over and over again, I began to think about and analyze the processes. Some of this may be helpful for knitting any type of small project in the round, and for anyone who has been afraid of or has forgotten how to do the Kitchener stitch.

Setting Up to Knit in the Round
See Video for setting up and beginning to knit in the round
There are many cast-ons, but my preferred one for working in the round is the long-tailed cast on. The Pussyhat Pattern instructs the knitter to cast on 50 stitches, work flat, and seam up the sides. Given that I am not a big fan of seaming–not to mention that stockinette in the round is all knits and no purls–I modified the pattern to work in the round. Casting on 50 stitches then seaming the sides translates into 100 stitches when joined, which I found to be a bit large. Experimenting with different numbers of cast-on stitches to make a medium sized hat, I settled on 92 stitches with a worsted weight yarn on a US size 4 (3.5 mm) needle. Any multiple of 4 works for this pattern, so this can easily be adjusted for gauge with different yarn weights and needle sizes.
Unlike cast ons that draw the working yarn from the ball as you need it, such as a cable or knit cast on, a long-tailed cast on requires pulling out enough working yarn in advance to complete the cast on; one has to guess how much will be needed. It was a light bulb clicked on and burning bright when I got the tip for casting on with the outside and inside ends of a cake or pulling yarn from two separate cakes of the same yarn type. By tying a slip knot to join the two separate strands, the working yarn can be drawn from the balls as needed without pulling it out in advance. I cannot say how many times I have approached the end of a large number of cast-on stitches only to run out of yarn before I reached the end. It is very difficult to guesstimate how much yarn to pull out for a cowl worked in the round that calls for more than 300 cast on stitches. This method works great, but there is a dark side. When drawing from two strands of yarn, the cast on edge has two tails rather than one to weave in. So, although I love, love, love this method for larger numbers of stitches, for casting on something smaller like socks or a hat I find there is less to fiddle with if I just estimate how much I need. I think I pulled out about 5 or 6 feet of yarn for casting on each of these hats, leaving me with one healthy tail to weave in later.
Cast on the number of stitches required plus 1. I will explain more about the extra stitch later, but it is for joining in the round. In my case, I wanted 92 stitches so I cast on 93. Before joining to work in the round, make sure that none of the stitches are twisted. I like to align the stitches so that, holding the tips of the needles together to form an oval, the live stitches are to the outside and the cast on edge is facing to the inside.
There are a few tricks for joining in the round once the stitches are cast on. I like to swap stitches from both needles so that the first cast on stitch and the last cast on stitch overlap. This requires casting on an additional stitch which is knit together (or purled together) with the last stitch on the end of the first round. With the needle holding the first cast on stitch in your left hand and the last cast on stitch in your right, move the first cast on stitch from the left needle to the right needle; for the moment it is next to the last cast on stitch. Lift the last cast on stitch over the stitch that was just moved to the right needle and move it to the left needle. The first and last stitches have swapped places. The swapped stitch with the working yarn, the last one that was cast on, looks sloppy for the moment but that is okay. Tighten the stitch by pulling on the tails and begin working in the round. Be careful to knit with the working yarn from the ball, not the tail. This is an easy mistake to make with a long tail cast on because, with all that guessing, often there is a really long tail. And yes I have done this. More than once.
At the end of the round, the first cast on stitch that was moved to the right needle will be knit (or purled) together with the last stitch. At that point I place a marker to indicate the beginning of the round. For my 92 stitch hat, I cast on 93, swapped stitches from the ends of both needles, began my 2×2 rib K2-P2, worked to the last 5 stitches, ended the round with K2-P1-P2TOG, and placed my marker.
Starting to Work in the Round
See Video for setting up and beginning to knit in the round
The first round is the trickiest when working a rib pattern. Remember to check that your stitches are not twisting. If you have counted and rechecked the number of your cast on stitches, you should end the round with 5 stitches remaining. If not, you did not do the rib pattern correctly. To keep on track, it is helpful to either stop and read your knitting after each 4-stitch repeat of the pattern or recite something as you do it, like “Knit-Knit, Purl, Purl,” “Knit 1, 2, Purl 1, 2,” or “1-2-3-4” to keep the pattern in order. In reading your knitting, a purl stitch looks like it is wearing a little turtleneck sweater with a bar across the bottom and the knit stitch looks like it is wearing a loosely looped scarf. Once the first row is knit and the marker is placed, it is easier to follow along as you knit the knits and purl the purls. Particularly after the first few rows, it becomes obvious when you place a knit where a purl belongs or vice versa.
Working in the Round
Once the rib pattern was set-up, it was just a matter of following along until I reached 4 inches. I knit the stockinette section about the same height, so I just periodically folded it over to make sure it matched the rib section rather than stopping to measure each section.
I added a second marker half-way through the round, with 92 stitches that would be after the 46th stitch. When I got to the stockinette section, I did a purl before both the halfway marker and the start of round marker. This creates a virtual seam up the sides to give the hat more stability.
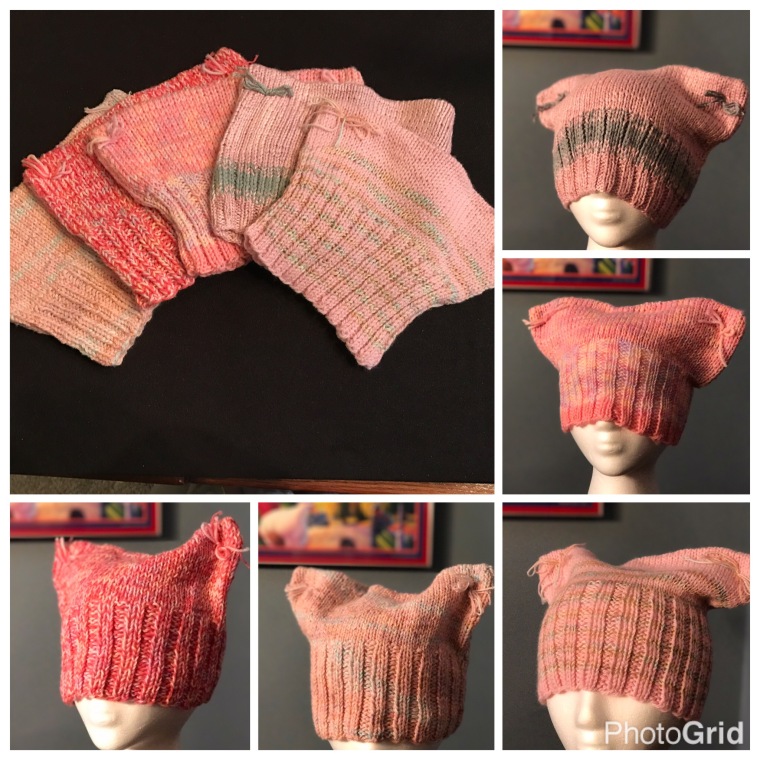
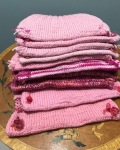
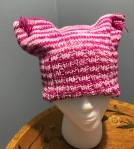
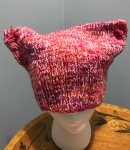
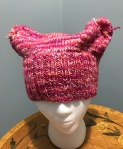
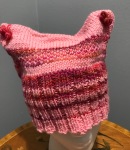
I bought several skeins of yarn, but also dove into my bins for every rose, blush, or pink yarn I could find. They are nice colors, and I did have a fair amount of what could loosely be called pink, but not in worsted weight. Consequently, some of my hats were made with 2 or even 3 strands held together and most of them combined multiple yarns. There were hats with stripes, color blocks, and DIY gradients. It was a happy accident, it gave the hats some added interest.
When working in the round, there can be an issue with a color change for stripes. Unlike knitting rows back and forth, knitting a round is really a spiral; a color change can look like a blip at the start of the round. There is a trick of lifting the stitch from the row below as demonstrated in this video by PlanetPurl. When the colors were very similar I did not bother, but it was helpful with contrasting colors to have a more smooth transition. Often, when using multiple yarns and changing to a slightly different color, I interspersed rows of old and new so the color shifts looked more gradual.
Kitchener Stitch
See video for learning and remembering the Kitchener stitch
Working in the round made the pattern go much faster, but I did have to graft the hat at the top. The original pattern was folded and joined on the sides; the top was simply the fold. On the Ravelry Pussyhat Project forum, some people did a 3-needle bind-off. Another person did Jenny’s magic cast-on and worked top down rather than bottom-up. I opted to work from the bottom up and closed the top of the hat with the Kitchener stitch.
Now some people gasp, shudder, and run as fast as they can when they hear those words, but the Kitchener stitch is not at all difficult. It is fiddly, and one has to pay attention to the order in which he or she does things, but what I have always found annoying is trying to remember that order. It seems I always need to take a trip to YouTube and watch a video or two when I have not done the Kitchener stitch in a while. The advantage of having done 20 hats using the Kitchener stitch is that I had a great opportunity to break down what I was doing and really think about it.
Before starting, you want the same number of stitches divided evenly between two needles. That is not easy to do when stitches are evenly distributed on a circular needle in the round, but the marker at the midpoint delineates an even number of stitches between what I will call the front and back needles. Later, as you work across and there are fewer stitches remaining on the needles, you can pull out the cord where the marker is and divide the stitches evenly.
Hold the needles so the back needle has the working yarn and the last stitch worked in the final round while the front needle has the start of round marker and the first stitch of the final round. Remove the marker. Cut the yarn leaving a tail long enough to work across the top. More is better…it is painful to run out of yarn in the midst of doing the Kitchener stitch. Thread the working yarn on to a tapestry needle and you are ready to start. But before we get started, let’s look at the sequence of steps for the Kitchener stitch.
There are 4 steps.
- Put the needle knitwise into the first stitch on the front needle, draw the yarn through, and remove the stitch from the needle
- Put the needle purlwise into the next stitch on the front needle and draw the yarn through but do not remove the stitch
- Put the needle purlwise into the first stitch on the back needle, draw the yarn through, and remove the stitch from the needle
- Put the needle knitwise into the next stitch on the back needle and draw the yarn through but do not remove the stitch
After the 4 steps, two stitches are joined and removed from the needles and two stitches are anchored and ready to be removed in the next round. The process creates a weave that looks like stockinette and creates a nearly invisible join. Steps 1 and 2 are worked on the front needle, steps 3 and 4 on the back needle.
To abbreviate it, it is 1) Knit off, 2) Purl on, 3) Purl off, and 4) knit on. One could say to themselves “Off, on, off, on,” “Knit-off, Purl-on, Purl-off, Knit-on,” or “Knit, purl, purl, knit” as they step through the Kitchener Stitch. For some reason what works for me is to recite “1, 2, 3, 4” as I work through the steps.
Notice that if you start with a knit on one needle, you end with a purl on that needle and vice versa. But how do you remember which is which? This is the memory trigger: look at the stitches on the front needle. You are looking at the right side (RS) of stockinette which, when knit flat, is always a knit stitch. So, begin with a knit on the front needle and end with a purl. Now, without changing position of the needles, look at the stitches facing you on the back needle. They are the wrong side (WS) of stockinette, which when knit flat is always a purl. So, begin with a purl on the back needle and end with a knit. What else do you need to remember? The first stitch on each needle is taken off and the second stitch is worked in the opposite direction but always remains on.
To start the Kitchener stitch, some knitters will just jump right in with the 4 steps, claiming that it gives them a smoother edge. The traditional way is to do a set-up before diving in. The set-up is simply doing steps 2 and 4 only then proceeding into the 4-step process. In other words, put the needle in purlwise and draw the yarn through the first stitch of the front needle, leaving the stitch on the needle, then put the needle in knitwise and draw the yarn through the first stitch on the back needle, leaving the stitch on the needle. Now begin and repeat the 4-step Kitchener stitch until 1 stitch remains on each needle.
To end, when there is only 1 stitch left on each needle, you do steps 1 and 3 only: put the needle in the last stitch of the front needle knitwise, draw the yarn through, and drop the stitch off the needle then put the needle through the last stitch on the back needle purlwise, draw the yarn through, and drop the stitch off the needle. I find the final stitches look a bit lumpy, but what worked well for me was to put the needle in behind the last stitches worked, draw it through the work, pull it tight, and weave in the ends.
When you get down to the final stitches, I find it helpful to put my finger on the remaining stitches to make sure they do not fall off. Also, it is important to maintain a firm and even tension as you go, but do not tighten up the yarn too much or it will not match your knit gauge.
Finishing
As to weaving in ends, as a friend of mine says, “Everyone goes to Hell in their own way.” I had the faux seam up the side and that made a great place to hide the ends. I like to weave in ends in two directions–up then down or down then up–so they withstand stretching and finally run the needle through some stitches to really anchor the end. I trim the yarn leaving just a bit so it will have enough length to settle in. Although many swear that one should weave ends in after washing and blocking, I always do it before and have had fewer problems that way. Weaving in is not usually someone’s favorite thing to do, but we all suffer through it in our own way.
I did not worry about color bleed and did not prewash any of my yarn, but I did use color catcher sheets in the wash when there were strongly contrasting colors. With blocking, the pattern was so simple I merely shaped them flat on a blocking board.


So ends my 20 hat odyssey, but wait…I just returned from the store where I found a ball of baby pink 100% merino on sale. Looks like it will be 21 and done.
Videos in the post: Getting started working in the round and Understanding the Kitchener stitch

 If the wool gets really stretched out in the washing process (shhhh, don’t tell anyone I said this) a couple of minutes in a dryer can tighten those stitches back up…but be very careful! The hat should still be damp enough to pat into shape and air dry.


 Edited January 12 to add hats made for sister marches.


