Finding your favorite needle is a matter of trial and error, and the hunt can get quite expensive if that trial and error means purchasing a variety of needles to try out different the options. At the 2017 Knitting Pipeline Retreat, hosted by Paula Emons-Fuessle of the Knitting Pipeline Podcast along with her collaborators Bronwyn, Sarah, and many others, I held a break out session for a needle tasting. Needles were limited to circular options that are readily available online or in local yarn shops, but there were still plenty of options to sample. With what I had in my stash, some quick purchases, and a few borrowed from my knitting group, we managed to cobble together a tasting room with 24 different needles.
The Tasting Room
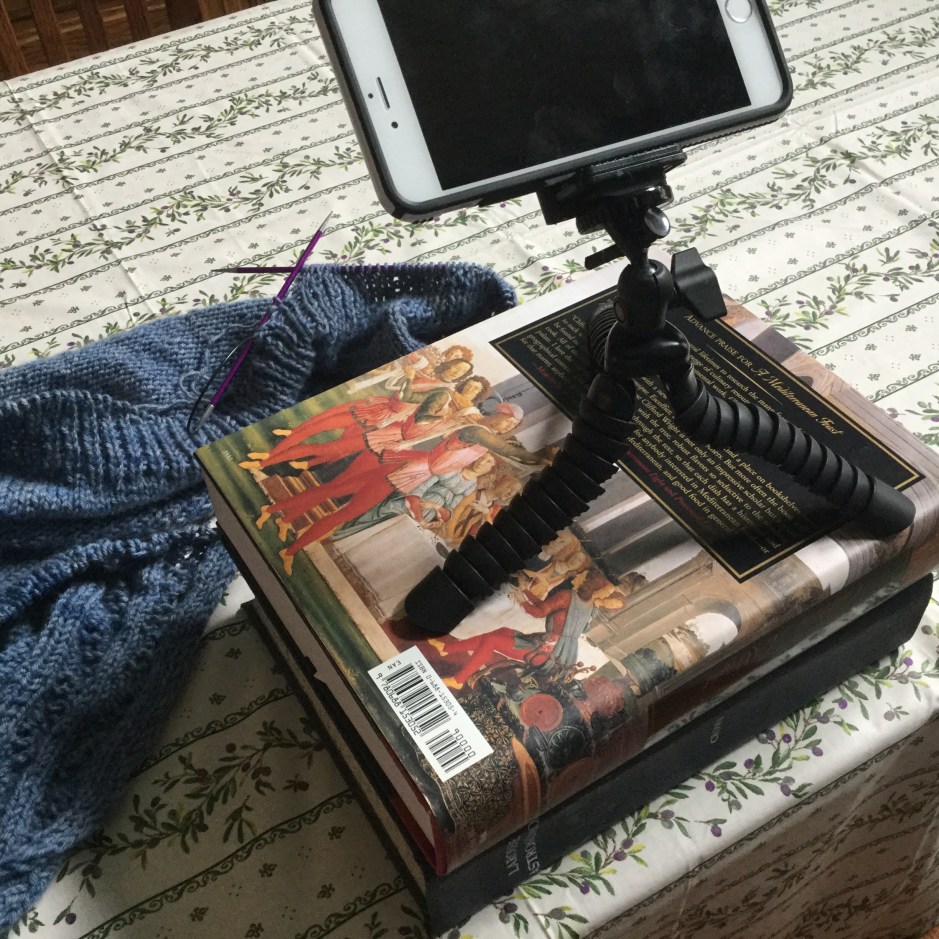
I set up three tables with place cards, rating sheets, and needles prepared with ready-to-knit swatches. Two tables had swatches prepared to knit flat, one table with metal needles  and one with needles made from other materials, including wood, composite, and bamboo. The third table was set up with swatches to work magic loop in the round using smaller needles typically used for sock knitting. Knitters were given the opportunity over 2 hours to visit the break out room and sample the needles. They were asked to rate the needles from 1 (not for me) to 5 (LOVE this needle). A copy of the session handout and list of needles is available here and a copy of the rating sheet is available here. For those unfamiliar with magic loop, I created a quick video tutorial in advance and offered to demonstrate the technique at the start of the session.
Needle Types
In addition to the materials used to make needles—metal, wood, bamboo, plastic, and so on—there are 3 basic types of needles: straights, double pointed needles (DPNs), and circular needles. With circular needles, it is not just the material, texture, and point of the needle to consider but also the cable type, cable flexibility, and the join where the cables meet the needles. To further complicate matters, a circular needle can be fixed or interchangeable. The way the cord attaches to the needles in interchangeables varies; some use a tightening mechanism, such as the little key used by Knitpicks. Some, such as Addi and Denise, use a twist and click approach. Some, such as Dyakcraft and Signature, use a twist and tighten approach with a recommendation to use a large rubber band or disk to assist in hand tightening. The reliability of the connection can be an issue—especially with the twist and tighten—and can make an otherwise lovely needle a source of frustration if the connection fails during use. Some brands are available in either fixed or interchangeable formats, some in only one or the other. This session was limited to circular needles, but included both fixed and interchangeable needles.


Caveats
Before I list the rankings of the needles, a couple of caveats.
The ranking is based on the average response of the 5-point rating (i.e., sum of the ratings divided by the number of knitters rating the needle). Looking at an average rating is one measurement, but the details show that individual responses can vary quite a bit. There was also more interest in some needles than in others, which meant some of the averages were calculated from more ratings than others (as few as 4 and as many as 15). Details for each of the needles are listed below in alphabetical order, including individual ratings, comments, and my thoughts.
Secondly, were this a funded exercise, I would have made sure that all needles were the same size and set up with swatches using identical yarn. As it was, the tasting was cobbled together with what I had available in my yarn bin and needle collection. Also, I would have gathered information about the people testing, such as their knitting experience and their needle preferences before the tasting, and of course had a lot more people in order to get a lot more data.
Finally, were this a controlled research study, I would not have left a rating form next to each needle. Although people love what they love and have their needle loyalties, seeing the previous ratings and comments of others on the rating form no doubt influenced their responses to some degree. It would have been ideal for each person to have their own form, have had the time (and patience) to test every needle, and to be unaware of the opinion of others. Of course, with all the chattering and sharing that was going on, having it be more controlled would not have been nearly as fun. We were, after all, attending a retreat not in a focus group.


Bottom line, this is not professionally conducted research, it is a lot of fun loving knitters at a knitting retreat trying out needles, sharing their thoughts, and having a good time. It is also not a prescription for which needles you should be using. Whether your favorite needle is the last place Denise or the first place Turbo Rocket, what is important is that you find the needles that work for you and that you enjoy using. My own ranking would be somewhat different than the one that resulted from the group’s ratings, but I think it is a decent representation of what people generally liked and a good indicator of needles that are worth trying out for yourself if you have not already done so.
For all that, here is what a group of knitters collectively decided were the highest rated needles.
Rankings Based on Average Ratings
| 1 | Skacel: Addi Turbo Rockets, US Size 2 (2.75 mm) |
| 2 | ChiaoGoo: Red Lace, US Size 5 (3.75 mm) |
| 3 | Skacel: Addi Turbo Rockets, US Size 4 (3.5 mm) |
| 4 | Signature Needle Arts: Stilettos with 5” shaft, US Size 6 (4 mm) |
| 5 | KnitPicks: Rainbow Wood, US Size 8 (5 mm) |
| 6 | Dyakcraft: Heavy Metal interchangeables, US Size 1 (2.25 mm) |
| 7 | Knitter’s Pride: Dreamz, US Size 4 (3.5 mm) |
| 8 | Signature Needle Arts: Stilettos with 6” shaft, US Size 6 (4 mm) |
| 9 | Skacel: Addi Turbo, US Size 5 (3.75 mm) |
| 10 | Chiagoo: Red Lace, US Size 2 (2.75 mm) |
| 11 | KnitPicks: Nickel Plated, US Size 8 (5 mm) |
| 12 | Signature Needle Arts: Socks w/ 6” Stiletto shaft, US Size 1 (2.25 mm) |
| 13 | KnitPro: Zing, US Size 2.5 (3 mm) |
| 14 | HiyaHiya: Stainless Steel, US Size 0 (2 mm) |
| 15 | Skacel: Addi Turbo, US Size 5 (3.75 mm) |
| 16 | HiyaHiya: Bamboo, US Size 5 (3.75 mm) |
| 17 | Kollage: Square – Firm cable, US Size 2.5 (3 mm) |
| 18 | Clover: Takumi , US Size 5 (3.75 mm) |
| 19 | Lantern Moon: Destiny Circulars, US Size 10 (6 mm) |
| 20 | Knitter’s Pride: Dreamz, US Size 0 (2 mm) |
| 21 | Knitter’s Pride: Karbonz, US Size 6 (4 mm) |
| 22 | Dyakcraft: Heavy metal, US Size 3 (3.25 mm)* |
| 23 | Knitter’s Pride: Trendz, US Size 5 (3.75 mm) |
| 24 | Kollage: Square – Firm Cable, US Size 1 (2.25 mm) |
| 25 | Denise: Denise, US Size 7 (4.5 mm) |
| * See needle description for notes on this rating |
Ratings Details by Needle
Chiagoo: Red Lace
Type: Metal fixed
Size: US 2 (2.75 mm) and US 5 (3.75 mm)
Swatch type: magic loop (smaller needle) and flat (larger needle)
Rating: Overall average rating of 4.52 for both sizes combined
US 2 (2.75 mm) Ranked 10th with an average rating of 4.35 (range 3 – 5)
US 5 (3.75) Ranked 2nd with an average rating of 4.68 (range 4 -5)


This needle was tested knitting flat using US size 5 (3.75 mm) and with magic loop using US size 2 (2.75 mm); the larger needle came in at an impressive 2nd and the smaller 9th in the rankings. The needle has a nice amount of glide without being too slippery, a sharp tip, a good join, and a uniquely smooth yet strong cable. However, I find the cable a bit stiff when it comes to using magic loop and reach for other options when doing projects with that method. It is great for knitting in the round with 2 circulars and works really well for anything other than magic loop. My problem with the magic loop was with getting ladders between the needles; I just could not consistently tighten the stitches with the stiff cord creating counter pressure. Otherwise, I am more than happy to knit with this needle. This is among my favorites and it comes in at a strong 4.5 in my ratings.
Comments about the US 2 (2.75 mm)
- Sharp, smooth, smooth join.
- Like cord & tip
- Smooth & fast knitting
- Great points, cord is stiff but doesn’t have a kinky memory so pretty good for magic loop
- Smooth. Nice cable. Easy to move stitches on and off the needles when “switching sides”
- I like the cord
- I love the cable. Nice needles
- Smooth but cord too rigid for magic loop
- Love the flexible cord
- Smooth sharp point
Comments about the US 5 (3.75 mm)
- Nice, sharp, solid cable, good joins
- Love the point and the cord
- Very nice point, nice stiff cord
- Sharp, slick
- My favorite needles
- So smooth, perfect points
- Love
- Nice joints
- Smooth but the cable feels so stiff
- Nice point, nice join, stiff cable
|
US 2 (2.75 mm) |
US 5 (3.75 mm) |
Overall (both) |
||||
| Rating |
Count |
Pctg |
Count |
Pctg |
Count |
Pctg |
|
5 |
4 |
40% | 7 | 63.64% | 11 | 52.38% |
|
4.5 |
1 |
10% |
1 |
9.09% |
2 | 9.52% |
|
4 |
4 |
40% |
3 |
27.27% |
7 |
33.33% |
|
3 |
1 |
10% |
— | — |
1 |
4.76% |
|
Overall |
10 |
100% |
11 |
100% |
21 |
100% |
| Average |
4.35 |
4.68 |
4.52 |
|||
Clover: Takumi
Type: bamboo fixed
Size: US 5 (3.75 mm)
Swatch type: flat
Rating: ranked 18th with an average score of 3.5 (range: 2- 4)

I bought this needle specifically for the testing and admit to being surprised. I had low expectations but found it fairly comfortable and easy to use with a smooth needle and a decent join. If the zombie apocalypse struck and no other needles were available, I could knit with these. One of the testers told me that the tips tend to get dull after use. I would give them a solid 3 when new.
Comments
- Smooth, nice join Very light could be both a + or a – point. Easy on hands hard to control
- Needles are smooth and easy to knit with, cord is rough and stiff
- Like sharpness of needle. Not a fan of the cord. Like bamboo, good price
- Cord too stiff for me
|
Rating |
Count |
Pctg |
|
|
4 |
3 | 75% | |
|
2 |
1 |
25% |
|
|
Overall |
3.50 |
4 |
100% |
Denise: Denise convertibles
Type: Plastic interchangeable
Size: US 7 (4.5 mm)
Swatch type: flat
Rating: Ranked 25th with an average score of 1
 These plastic interchangeable needles came in last place at 25. The cords are large and stiff but the joins are not terrible. They have a twist and lock mechanism that is pretty reliable. They were quite innovative when they first came out and have since been eclipsed by other interchangeable options. It was early on in my knitting career when I found out about these and was so excited to have all the needles I would ever need in a neat little plastic case. I was so excited that I bought a set for both my daughter and mother, and that is all they ever use to this day. I have moved on but holding them brings back a certain comfortable familiarity. They might be a decent choice for beginning knitters; they are so solid and grippy with a more rounded tip. I would rate them a 2, but that is being kind for old time’s sake; it would be more honest to concur with everyone else and give them a 1. Sometimes things are better left in the past.
Comments
- These are terrible
- Squeaky and too flexible
- Too soft tips, too flimsy cord
- Bad join, don’t move
- Like knitting with a “toy” Cord too stiff, not very good point
- Cord stiff and needles not pointed enough
100% of the 7 people who tried this needle rated it a 1.
Dyakcraft: Heavy metal
Type: Metal interchangeable
Size: US 1 (2.25 mm) and US 3 (3.25 mm)
Swatch type: magic loop (smaller needle) and flat (larger needle)
Rating: Overall average rating of 3.56 for both sizes combined
US 1 (2.25) Ranked 6th with an average rating of 4.42 (range 3 – 5)
US 3 (3.25 mm) Ranked 22nd with an average rating of 2.87 (range 1 – 4)
[alternative score: Ranked 19th with an average rating of 3.36 (range 3 – 4), see below]


I have always expected to love Dyakcraft needles, some of their lines can be so elusive that I have called them unicorn needles. After waiting almost 2 years for Darn Pretty’s I realized that, although they were gorgeous, I still went for my Signatures and they wasted away until I eventually sold them. Likewise, I fell in love with the look of the Lavender Lights but found they were not that comfortable in my hands and they too languished in their case unused. In between those purchases, I bought a set of the Heavy Metals because they came in the smaller sizes that Signature did not offer.
I really like the feel of the needles. The more they are used, the smoother they become. The points are really nice and the yarn passes nicely over the join. Unfortunately, the twist mechanism for connecting is spotty and the cords are quite stiff and awkward to work with. Even with tightening these with a rubber gripper, the needles frequently come loose and, although they do not completely disconnect, the loosening creates a groove that catches the yarn. Although the cord swivels, I invariably develop a kink where the cord meets the join. That kinky cord created some discussion on how to smooth out a cord, one  person described how she boils her cords in an iron frying pan, being careful not to touch the sides. Another person said she wears cords about her neck to warm and soften them. I suggested storing cords by hanging them rather than winding them back into a package or case. The bend in the cord develops as I knit, attempted repairs have to wait until the project is finished.
Interestingly enough, the undoing of the larger needle resulted in the undoing of the scores for that needle. Late in the testing the needle came undone and—without a rubber disk on hand in the tasting room—I could not hand tighten it enough to keep it from immediately loosening again. From that moment when the needle came loose, the ratings went from 3’s and 4’s to 1’s and 2’s. If I threw out bottom scores, ranking for the bottom needle would be 19th with an average rating of 3.36 rather than 21st with an average rating of 2.87 and the overall score would be 3.91 rather than 3.56. I did not throw out the scores, it is an unfortunate flaw with these needles but I think they were rated rather harshly as a result.
My score for these needles is 4, it would be a 5 if not for the cord and the connections.
Comments on US 1 (2.25 mm)
- Flexible cord. Nice point. Slick
- Nice points slick. Good cord
- Smooth joins. Nice cable
- Very nice and sharp. Not heavy at all.
- Feel substantial but not too heavy
- Nice firm points, not bendy, cable is too stiff, otherwise would be perfect.
- Nice feel
- Nice, easy to use, cord is just right
- Can feel friction when I rub the needles together to stitch. Cord is a bit to flexi
- When needles rub they scrape a bit. Would drive me crazy. Like fingers on a chalkboard.
Comments on US 3 (3.25 mm)
- I like the heavy feel.
- Nice point, smooth
- Don’t like the join
- Not a fan of the weight
- They make too much noise
- Like tips. Cables too stiff
- Too heavy, kinky cord
- Nice point, OK cord, too expensive
- Cord too firm, too pointy
- Cord too stiff
- Join loose, cord too twisty
- Awkward to knit with
|
US 1 (2.25) |
US 3 (3.25) |
Overall (both) |
||||
| Rating |
Count |
Pctg |
Count |
Pctg |
Count |
Pctg |
|
5 |
5 |
41.67% |
— |
— |
5 |
18.52% |
|
4.5 |
3 |
25.00% |
— |
— |
3 |
11.11% |
|
4 |
2 |
16.67% |
4 |
26.67% |
6 |
22.22% |
|
3.5 |
1 |
8.33% |
— |
— |
1 |
3.70% |
|
3 |
1 |
8.33% |
7 |
46.67% |
8 |
29.63% |
|
2 |
— | — |
2 |
13.33% |
2 |
7.41% |
|
1 |
— | — |
2 |
13.33% |
2 |
7.41% |
|
Overall |
12 |
100% |
15 |
100% |
27 |
100% |
|
Average |
4.42 |
2.87 | 3.56 | |||
HiyaHiya: Bamboo
Type: Bamboo fixed
Size: US 5 (3.75 mm)
Swatch type: flat
Rating: ranked 16th with an average score of 3.70 (range 3 – 4)
 I bought these for the tasting to add to the-alternative-to-metal options. I liked these better than the Clover Bamboo and, although I am not a fan of non-metal needles in general, could definitely see myself using these with slick yarns. There is some grab on the needle surface, the cord is stiff enough that the yarn transitions smoothly from cord to needle, and the points are nice and pointy. In general I would not like to use these for wool or cotton yarns. I would give them a 3.5 for general use but a 4 for use with slinky yarns; good to have in my arsenal when I need them but definitely a special purpose tool.
Comments
- Nice, for bamboo
- Don’t use wood often, but I would use there
- Pointy enough & smooth sliding
- Nice & smooth, nice join, too stiff cord
- Smooth wood and pointy enough
- Smooth, nice cord
- Nice cord, sharp points
- Nice smooth wood. Would be good with a silk yarn.
- Smoother than clover not as smooth as Dreamz or Rainbow wood
- Very sticky. I’d lend to a beginner & keep them for very slick yarns
|
Rating |
Count |
Pctg |
|
|
4 |
7 |
75% |
|
|
3 |
3 |
25% |
|
| Overall |
3.70 |
10 |
100% |
HiyaHiya: Stainless Steel
Type: Metal (stainless) fixed
Size: US 0 (2 mm)
Swatch type: magic loop
Rating: ranked 14th with an average score of 3.92 (range 3 – 5)
 I picked these up when I wanted to do socks in magic loop for traveling. I found the Chiagoo Red Lace cable too stiff for doing magic loop and had a bit more luck with these. I ended up using Addi Turbo Rockets, but these were definitely worth a try. I prefer the texture of some of the other top rated needles, but these were fine, the tips are sharp enough, and the join is smooth. The cord is firm for carrying stitches, maybe a touch too firm for magic loop. Not one of my favorites but definitely a good option, particularly for flat knitting. I give these a 4.
Comments
- Nice & sharp, smooth joins
- Sharp, easy to use, smooth knitting
- Cord stiffer than I like
- Cord stiffer than I like (same)
- Cord a bit stiff. Very smooth needle. Nice for loops with 2 sets of needles
- Very smooth
- Sharp, smooth join but cable too rigid for magic loop
- Slick, great points, cord has too much memory for magic loop
- Quite Sharp. Cord too stiff
- Nice sharp point but stiff cord
- Cord too stiff
|
Rating |
Count |
Pctg |
|
|
5 |
2 |
16.67% |
|
|
4 |
7 |
58.33% |
|
|
3 |
3 |
25.00% |
|
| Overall |
3.92 |
12 |
100% |
KnitPicks: Nickel-plated
Type: metal (nickel plated) interchangeable
Size: US 8 (5 mm)
Swatch type: flat
Rating: ranked 11th with an average score of 4.33 (range 3 – 5)
 Cords on the KnitPicks interchangeables are connected with a key to tighten the join. It usually holds fairly well, although it is always a good idea to check the tightness of the joint after knitting a while. Unfortunately, I have found the quality control on the Knitpicks is a bit spotty. The cords themselves can detach from the join, which has nothing to do with the mechanism used to connect cords and needles. These needles were borrowed for the tasting, I had not used the metal KnitPicks before. I thought they felt light and the surface was fairly smooth, but I was not terribly fond of how the yarn glided over the join. With the quality issues that plague KnitPicks, I give these a 2.
Comments
- This is my join!
- Comfortable, cord needs to loosen up
- Not big fan of metal, but nice
|
Rating |
Count |
Pctg |
|
|
5 |
3 |
50.00% |
|
|
4 |
2 |
33.33% |
|
|
3 |
1 |
16.67% |
|
| Overall |
4.33 |
6 |
100% |
KnitPicks: Rainbow Wood
Type: wood interchangeable
Size: US 8 (5 mm)
Swatch type: flat
Rating: ranked 5th with an average score of 4.5 (range 3 – 5)
 These came in quite high on the ratings but my experience with their quality and reliability leads me to give these a much lower rating of 2. With me, it is personal. When I was on the outer edges of a circular lace shawl the cord pulled out of assembly and I did not notice it right away. All interchangeables have the risk of coming loose or undone, but this was the cord itself separating from the connector. After that very painful incident, I was wary and used these needles only on smaller projects; it did happen again but with less at risk. Still, these were one of the first interchangeable options and, after starting out with Denise, I was so excited when I first got these. The joins and cord, when they work, are pretty good, but I think there are better options for the needle surface. I gave mine away and had to borrow this needle for the tasting.
Comments
- I don’t love bamboo needles but these are very nice. Have a “slickness” similar to metal
- Sharp and slick, warm in my hand
- Nice needle, light and easy to use
- Best wood needle – Smooth and slick for wood. Could be pointier but great for wood.
- Lovely interchangeable. Smooth, pretty 🙂
- Not bad – but the join is not smooth
- Maybe a little too sticky. Very light in hand
- Like the tips but doesn’t slide along. Not fond of the join.
|
Rating |
Count |
Pctg |
|
|
5 |
5 |
62.50% |
|
|
4 |
2 |
25.00% |
|
|
3 |
1 |
12.50% |
|
| Overall |
4.50 |
8 |
100% |
KnitPro: Zing
Type: metal fixed
Size: US 2.5 (3 mm)
Swatch type: flat
Rating: ranked 13th with a score of 3.96 (range 1 – 5)
 I was so excited to find out about these beautiful needles and ordered DPNs from Scotland. They were nice, and so lovely in all the vivid colors. Our knitting group ordered some of the circulars and we were disappointed. The larger the needle, the larger the tip; everything is enlarged proportionally so what is perfectly small and sharp in the smaller size is bigger and blunter in the larger. Still, that would be forgivable if there were better quality control with the joins; some are fine and some are not. I absolutely cannot use them, I have started a couple of projects and grew so frustrated with the yarn getting caught in some of the joins that—gauge be damned—I ripped everything out and started again with different needles. It is so lovely to think that needles that look similar to the beautiful Signatures could be a less expensive option, but in this case you get what you pay for. These needles will not be put back into my stash. I give these a 1.5, the cord is not bad, the needle itself is smooth if inconsistent from size to size with the points, but that join is a deal breaker.
Comments
- Nice to work with
- Very nice. Feels very similar to Signatures
- Very nice. Smooth.
- Cord has a lot of memory, but otherwise great
- Not sure of cable, but very smooth
- OK, I probably wouldn’t buy them
- Great tips
- A decent needle for the price
- Nice tip, cord OK
- Join on one side catches yarn. Other side is smooth. Good point though.
- Nice feel of needle and tip
- Hate join
|
Rating |
Count |
Pctg |
|
|
5 |
4 |
28.57 |
|
|
4.5 |
2 |
14.29 |
|
|
4 |
4 |
28.57 |
|
|
3.5 |
1 |
7.14 |
|
|
3 |
2 |
14.29 |
|
|
1 |
1 |
7.14 |
|
| Overall |
3.96 |
14 |
100% |
Knitter’s Pride: Dreamz
Type: wood fixed
Size: US 0 (2 mm) and US 4 (3.5) mm
Swatch type: magic loop (smaller needle) and flat (larger needle)
Rating: Overall average rating of 3.92 for both sizes combined
US 0 (2 mm) Ranked 20th with an average rating of 3.25 (range 2 -5
US 4 (3.5 mm) Ranked 7th with an average rating of 4.41 (range 4 – 5)


These are similar to the KnitPicks wooden needles, although I have never had any quality issues with the cord disconnecting from the join as I have had with the KnitPicks. The wood is nice and smooth and the points are nice, although I find the yarn struggles a bit over the join, these are not a bad option. I like that different sizes are different colors. The smaller US-0 feels a bit flimsy in wood, but to be fair I have never broken any of these; I just feel more comfortable using metal in smaller sizes. If the yarn slid over the join more smoothly I would give these a 4, but I am going with a 3.5 on these.
Comments US 0 (2 mm)
- My absolute favorite & go to for large projects. Good joins, points, and overall feel.
- Nice tip, nice point, flexible cable, smooth join
- Nice join. Stiffer cable. Good point.
- Perfectly nice. Don’t like wood for socks – too slow
- Feels like I would snap the needle too easily. Like Point
- Too flimsy
- Snap too easy. Feels good in my hands
Comments US 4 (3.5 mm)
- Smooth feels good in the hand
- has the feel of a metal needle
- Smooth, nice join, easy on hands. Nice cable
- Surprised, liked the feel of needle
- Smooth, nice cord, good point.
- Smooth join. Stiff-ish cable. Comfortable
- Harder to move along the needle
- Smooth, pointy but not too pointy
- Good feel
- Smooth
- Nice!
|
US 0 (2.20) |
US 4 (3.5) |
Overall (both) |
||||
| Rating |
Count |
Pctg |
Count |
Pctg |
Count |
Pctg |
|
5 |
1 |
12.50% |
4 |
36.36% |
5 |
26.32% |
|
4.5 |
— | — |
1 |
9.09% |
1 |
5.26% |
|
4 |
2 |
25.00% |
6 |
54.55% |
8 |
42.11% |
|
3 |
3 |
37.50% |
— | — |
3 |
15.79% |
|
2 |
2 |
25.00% |
— | — |
2 |
10.53% |
| Overall |
8 |
100% |
11 |
100% |
19 |
100%% |
| Average |
3.25 |
4.41 |
3.92 |
|||
Knitter’s Pride Karbonz
Type: carbon fiber fixed
Size: US 6 (4 mm)
Swatch type: flat
Rating: Ranked 21st with an overall average rating of 3.19 (range 1 – 4)
 I have a set of DPN Karbonz but had to borrow this needle to include it in this tasting. Personally, I dislike how the tips seem to catch the yarn. With the circulars, the join does not seem really smooth either. There is something about the transition between the carbon fiber and the metal joins and tips that just does not work. I give this needle a rating of 1, it is not for me.
Comments
- Smooth joins. Cable fairly flexible
- I love them, cord – OK, nice points
- Join a little rough, cord has too much memory
- Smooth, lightweight, comfortable.
- Love the tips. Cord is too stiff. One Joint is smoother than the other.
- hard to move along the needle
- Cord too coiled.
- Hate join
|
Rating |
Count |
Pctg |
|
| 4 |
2 |
25.00% |
|
|
3.5 |
3 |
37.50% |
|
|
3 |
2 |
25.00% |
|
|
1 |
1 |
12.50% |
|
| Overall |
3.19 |
8 |
100% |
Knitter’s Pride: Trendz
Type: Acrylic fixed
Size: US 5 (3.75 mm)
Swatch type: flat
Rating: Ranked 23rd with an overall rating of 2.55 (range 1 – 4)
 I had tried the Marblz DPNs and did not like them, but thought I would purchase a set of these for the tasting to try an acrylic option. Although they feel warmer in my hands than metal needles, something someone might like, I would rather use Denise needles than these. The surface feels a bit too grabby, the transition from cord to needle is choppy and rough, and with the flex of the needles it feels like they could snap apart in my hands. After talking to a few people at the tasting, I found I paid way too much for these, especially as they will not be joining my other needles in stash. They are headed to the next give away table. I give them a 1; just cannot see rating them higher than I rated the Denise needles.
Comments
- Smooth knitting but needle feels fragile
- I like this needle. My current project is on the needle. Sharp Point; good join easy on my hands and wrists, no pain
- Nothing special
- Better than I expected, [xx]good KP joins. Very light, breakable feel
- not bad, don’t like the look of them, nice point, nice cord
- Not my favorite, sticky
- I agree with post above, sticky feel
- Squeaky, might be good for beginners
- Better than I expected for a plastic needle
- Rather tacky (in more ways than one)
- These are the needles from the dollar store
|
Rating |
Count |
Pctg |
|
|
4 |
2 |
18.18% |
|
|
3 |
3 |
27.27% |
|
|
2 |
5 |
45.45% |
|
|
1 |
1 |
9.09% |
|
| Overall |
2.55 |
11 |
100% |
Kollage: Square with Firm Cord
Type: Metal fixed
Size: US 1 (2.25 mm) and US 2.5 (3 mm)
Swatch type: magic loop (smaller needle) and flat (larger needle)
Rating: Overall average rating of 2.69 for both sizes combined
US 1 (2.25 mm) Ranked 24th with an average rating of 2.07 (range 0 -5)
US 2.5 (3 mm) Ranked 17th with an average rating of 3.55 (range 2 – 5)


Size matters when it came to testing. The points on the larger needles are nice; the one on the smaller should come with a warning sign. I used two sets of size US-0 with magic loop for socks while traveling, those sharp little points went right through my knitting bag like a porcupine. Thank you TSA for allowing me on board.
I tried these needles a long time ago with the softer cord and did not like them, the stitches would not transfer from the limp cord to the needle. A while back I tried their DPNs and liked the way the square shape stayed put when knitting in the round. Seeing the firm cord option, I gave the circulars another try. I find them comfortable in the hands, and the cord is still flexible enough to work well with magic loop, but my goodness those points on the smaller sizes are seriously sharp. I give these a 3.5.
Comments US 1 (2.25 mm)
- Light. Square feels great in the hands. 🙂
- Square shape is OK, too sharp
- Somewhat sharp feeling in the hand
- So sharp! Light. Nice cable
- Light, feels good in hand but tip too sharp
- Holy sharp needles, Batman!
- Too bendy
- Ditto (Holy sharp needles, Batman!)
- Great points, but the joins are rough and I’m not crazy about the stickiness of the needle
- Nope. Too sharp. Too light. Don’t like.
- Dangerously sharp
- Too sharp. I push needles down by tip. Not good for my knitting style
- Tips are lethal. Ick!
- Ouch!
- Double ouch! Way too sharp tips.
Comments US 2.5 (3 mm)
- Love the shape, great cord.
- Needles feel a bit grabby. Fairly smooth join. Can’t tell they are square when using.
- Nice hand feel. Wish the taper was longer
- Would take some getting used to, but I think I would like these.
- Shape inhibited my knitting
- Interesting feel
- Don’t like the angles
- Long learning curve for me to work comfortably with this shape
- Ehh. Not for me
|
US 1 (2.25) |
US 2.5 (3) |
Overall (both) |
||||
| Rating |
Count |
Pctg |
Count |
Pctg |
Count |
Pctg |
|
5 |
1 |
6.67 |
2 |
18.18 |
3 |
11.54 |
|
4.5 |
— |
— |
1 |
9.09 |
1 |
3.85 |
|
4 |
1 |
6.67 |
3 |
27.27 |
4 |
15.38 |
|
3 |
3 |
20.00 |
2 |
18.18 |
5 |
19.23 |
|
2.5 |
— |
— |
1 |
9.09 |
1 |
3.85 |
|
2 |
4 |
26.67 |
2 |
18.18 |
6 |
23.08 |
|
1 |
5 |
33.33 |
— |
— |
5 |
19.23 |
|
0 |
1 |
6.67 |
— |
— |
1 |
3.85 |
| Overall |
15 |
100% |
11 |
100% |
26 |
100% |
| Average |
2.07 |
3.55 |
2.69 |
|||
Lantern Moon: Destiny Circulars
Type: Wood fixed
Size: US 10 (6 mm)
Swatch type: flat
Rating: Ranked 19th with an average rating of 3.32 (range 2 – 5)
 After suffering quality issues with KnitPicks Rainbow Woods—and before I was brave enough to try metal needles—these were my next step. I loved the feel of wood and collected several of these in rosewood and ebony. The cord was firm, the needle smooth and warm feeling in my hands, but I struggled with the joins. Some needles were worse than others for drawing the yarn across that join, I found that the rosewood needles were more difficult to use than the ebony. What drew me to this needle originally was the claim that the swiveling cord was easier on the hands. I did like the swiveling cord but never hit my stride with the join. I sold all but this one, which I had given away and had to borrow back for this tasting. I rate this needle a 3.
Comments
- Nice, fast knitting
- Not very sharp, yarn slides nicely
- Cable is a bit rigid, but needles are nice and smooth
- Not very sharp. Nice wood
- Nice feel on the hands
- Nice feel in the hand, decent join
- Good feel
- Nice joins
- Very light
- Not fond of needles, felt plasticy. I liked the cord. Too expensive for quality
- Not sharp enough, yarn doesn’t slide easily
- Cord too stiff. Wood feels like plastic to me
- Join catches some, feels plasticy, and has a very firm cord. It could use a pointier point.
- Too blunt on the point, feels plasticy
|
Rating |
Count |
Pctg |
|
|
5 |
1 |
7.14% |
|
|
4 |
7 |
50.00% |
|
|
3 |
1 |
7.14% |
|
|
2.5 |
1 |
7.14% |
|
|
2 |
4 |
28.57% |
|
| Overall |
3.32 |
14 |
100% |
Signature Needle Arts: Socks with 6” needles and stiletto tips
Type: metal (aluminum) fixed
Size: US 1 (2.25 mm)
Swatch type: magic loop
Rating: Ranked 12th with an average rating of 4.31 (range 3 – 5)
 Unlike Signature’s other circular needles, these smaller sock size needles are fixed. As with other Signatures, they are built to order with options of 4”, 5”, or 6” needles with either the stiletto or less sharp middy point, and with fixed cord options of different lengths. At this time, they are only available in size US-1 (2.25 mm) with plans to release size US-2 (2.75 mm) and the in between sizes of 2.5 mm and 3.0 mm sometime in the future. I usually knit socks on US-0 but I am looking forward to the 2.75 mm and 3.00 mm being available for those times when I cannot get gauge with a US-3 (3.25). The cord is stiffer than on their other needles and does not swivel. The join works fairly well, although in all honesty I just got these and I have not tested them with anything other than the magic loop with a relatively small number of stitches. There appears to be some resistance when pushing the stitches over the joins, it might be a touch sticky when knitting flat. I am hovering between a 4.5 and a 5 for these needles because of the non-swivel cord and I am a bit unsure of the join, but at first blush I like these. I am giving them a 5.
Comments
- Sharp, smooth
- Needle is firm enough, nice tip.
- Sharp but not too sharp tip. Nice needle length
- Lovely to work with, but I wish the cable was a bit more flexible and/or longer. Though the 5″ needles might be perfect.
- Love them!
- Gonna buy some
- Smooth fast, don’t like hand feel
- Sharp. Smooth. A little too light. Cord is super long.
- Sharp, smooth join.
- OK, but not worth the price for me
- Ditto (OK, but not worth the price for me)
- Needles too long
- Don’t like the cable and the tips are a little too sharp
|
Rating |
Count |
Pctg |
|
|
5 |
6 |
46.15% |
|
|
4 |
5 |
38.46% |
|
|
3 |
2 |
15.38% |
|
| Overall |
4.31 |
13 |
100% |
Signature Needle Arts: Stilettos
Type: metal (aluminum) interchangeable
Size: US 6 (4mm) with 5” needle tips and US 6 (4mm) with 6” needle tips
Swatch type: flat
Rating: Overall average rating of 4.5 for both tip sizes combined
5” needle tips ranked 4th with an average rating of 4.64 (range 4 – 5
6” needle tips ranked 8th with an average rating of 4.36 (range 3.5 – 5)

When I start a project, I reach for my Signatures. I have sizes US 3 to US 9, with multiple tips and cords for the sizes I use most. They are my go-to-needle when their sizes work for my project. The sharp tips, swiveling cords, and sheer beauty of them make them a joy to use. In the past few years my needle exploration has been for needles in sizes that Signature did not make, such as needles with 16” cords for hats and needles smaller than size US 3. Until recently, they were only available down to size US 3 for circulars, but they have plans to release smaller sizes in fixed circulars and recently released size US 1 (2.25 mm). The down side to these needles is the cord, unlike other interchangeable kits, the cords are specific to the needle size. In other words, a cord that goes with a size US 5 needle will not work with the size US 7. When I add a new size to my collection, typically I buy the tips, the shortest cord, and the longest cord.
There are several choices in building your needles, in addition to selecting the size of the needle and then length of the cord(s), you also choose the length of the needle tips and the sharpness of the tips. My preference is for the 6” in with stiletto tips. The cord is very flexible and can cause the stitches to lag across the join, I find that I push stitches up on the needle before knitting and having the longest length needle allows me to put a lot of stitches on the needle. I also find a longer needle more comfortable in my hands than the shorter ones. But, as evidenced by the tasting, size matters and some preferred the shorter 5” needle tip. We did not have a 4” tip in the tasting.
There is a simple twist mechanism for attaching the cords to the needles. Early on I had some issue with them loosening during use, but once I obtained their handy-dandy little rubber disc for tightening them it has not been much of a problem. They did not loosen during the tasting, but on big projects I do make it a habit to periodically check that they are firmly connected and give them a tightening if needed.
I give these needles a 5, but the cord could be a bit better.
Comments 5″ tips
- Best needle every made
- Very nice
- Love them!
- Thumbs up
- These are so fast
- Love these, Nice feel to the needles & good cord
- Not a fan of the softer cord, but great otherwise
- Lightweight, nice point
- Love the feel of the needle, I’m not crazy about the cord
- Very nice
- Fine, but I like 6″ better
Comments 6″ tips
- Fabulous!
- Smooth
- Great, but cable a bit flimsy
- Love the needles, hate the cord.
- Smooth join, great fit in my large hands
- Nice and smooth, don’t love the cable
- Love the needle. Not sure about the cord.
- Expected more given all the hype! Cord had too much memory – like the swivel in the cord
- Like the longer 6″, good cord, nice points
- Nice point, smooth. Stiff cable.
|
5″ needle tips |
6″ needle tips | Overall (both) | ||||
| Rating |
Count |
Pctg |
Count |
Pctg |
Count |
Pctg |
|
5 |
6 |
54.55% |
3 |
27.27% |
9 |
40.91% |
|
4.5 |
2 |
18.18% |
3 |
27.27% |
5 |
22.73% |
|
4 |
3 |
27.27% |
4 |
36.36% |
7 |
31.82% |
|
3.5 |
— | — |
1 |
9.09% |
1 |
4.55% |
| Overall |
11 |
100% |
11 |
100% |
22 |
100% |
| Average |
4.64 |
4.36 |
4.50 |
|||
Skacel: Addi Turbo
Type: metal (brass) fixed
Size: US 5 (3.75 mm)
Swatch type: flat
Rating: Ranked 15th with an average rating of 3.81 (range 3 – 4.5)

These needles are my workhorse needles. The cord is stiff enough to carry the stitches smoothly and the needles are quite slick, a little too slick perhaps. The tips are okay but not as sharp as others. Still, this needle has always been a good basic choice, although I think the Addi Turbo Rockets have the edge. I give these a 4.
Comments
- I like the smoothness
- Nice join. Cord a little stiff. Good unless doing magic loop. Smooth join.
- Nice feel
- Again, not crazy about the cord
- Cord stiff
- Good join & weight. I like more point.
- Cord too stiff for me
|
Rating |
Count |
Pctg |
|
|
4.5 |
1 |
12.50 |
|
|
4 |
5 |
62.50 |
|
|
3 |
2 |
25.00 |
|
| Overall |
3.81 |
8 |
100% |
Skacel: Addi Turbo Rockets
Type: metal (nickel plated) fixed
Size: US 1 (2.25 mm) and US 4 (3.5 mm)
Swatch type: magic loop (smaller needle) and flat (larger needle)
Rating: Overall average rating of 4.86 for both sizes combined
US 2 (2.25 mm) Ranked 1st with an average rating of 5.0
US 4 (3.5 mm) Ranked 3rd with an average rating of 4.67 (range 4 – 5)


If I had to give up my Signatures, these are the needles that I would turn to. I first discovered the Addi Sock Rockets when I was trying to find an alternative to the Chiagoo Red Lace for magic loop. I tried a few options but was wowed by these. The needle is the perfect amount of slick for natural fibers like wool and cotton, although might be a bit too slippery for something like silk. The cord is firm enough to carry the stitches without being too stiff. The yarn glides over the joins effortlessly. Soon after buying my Turbo Sock Rockets I learned that they were dropping the “sock” from the name and making these in larger sizes as well as the smaller sock sizes. I will definitely be adding more of these needles to my stash as the need arises. If only the cord swiveled these would be perfection. I give these a weak but well-earned 5.
Comments US 2 (2.25 mm)
- Love!
- Smooth, nice cable and join
- Nice point and smooth join
- Nice point, smooth join, cable good
- Seem about perfect. 5″ needle and 40″ cable a bit stiff, but length works great
- Smooth. Needle right weight
- Great
Comments US 4 (3.5 mm)
- Super!
- Like!
- Love!
- Like them, smooth
- Almost too slick. Don’t like the cord
- So smooth
|
US 2 (2.25) |
US 4 (3.5) |
Overall (both) |
||||
| Rating |
Count |
Pctg |
Count |
Pctg |
Count |
Pctg |
|
5 |
8 |
100% |
4 |
66.67% |
12 |
85.71% |
|
4 |
— | — |
2 |
33.33% |
2 |
14.29% |
| Overall |
8 |
100% |
6 |
100% |
14 |
100% |
| Average |
5.00 |
4.67 |
4.86 |
|||


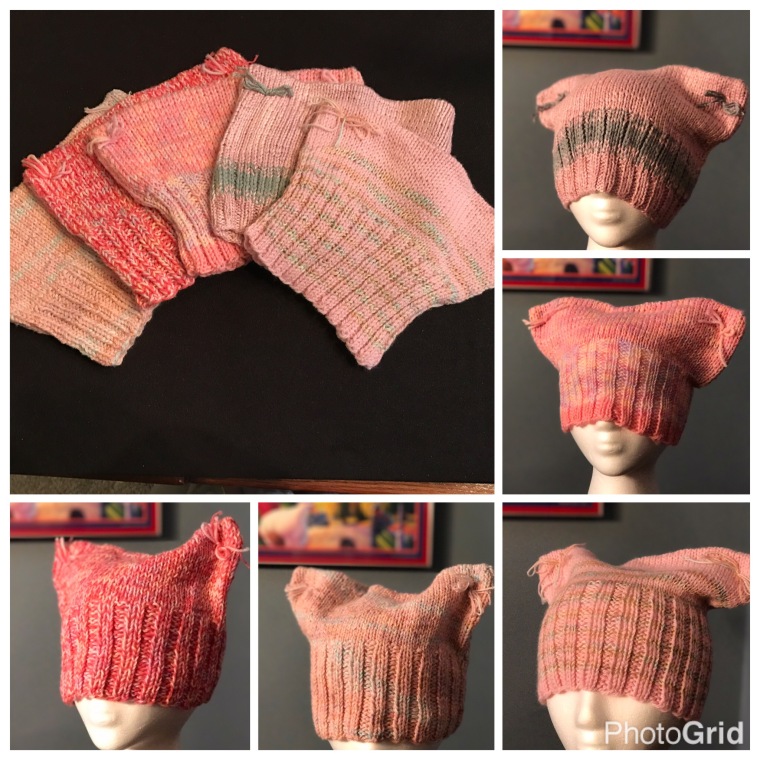


 If the wool gets really stretched out in the washing process (shhhh, don’t tell anyone I said this) a couple of minutes in a dryer can tighten those stitches back up…but be very careful! The hat should still be damp enough to pat into shape and air dry.


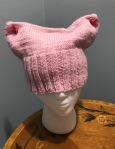
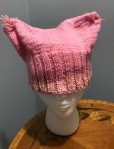
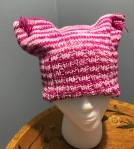

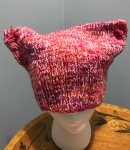
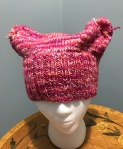
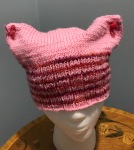
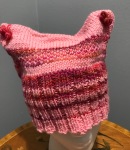
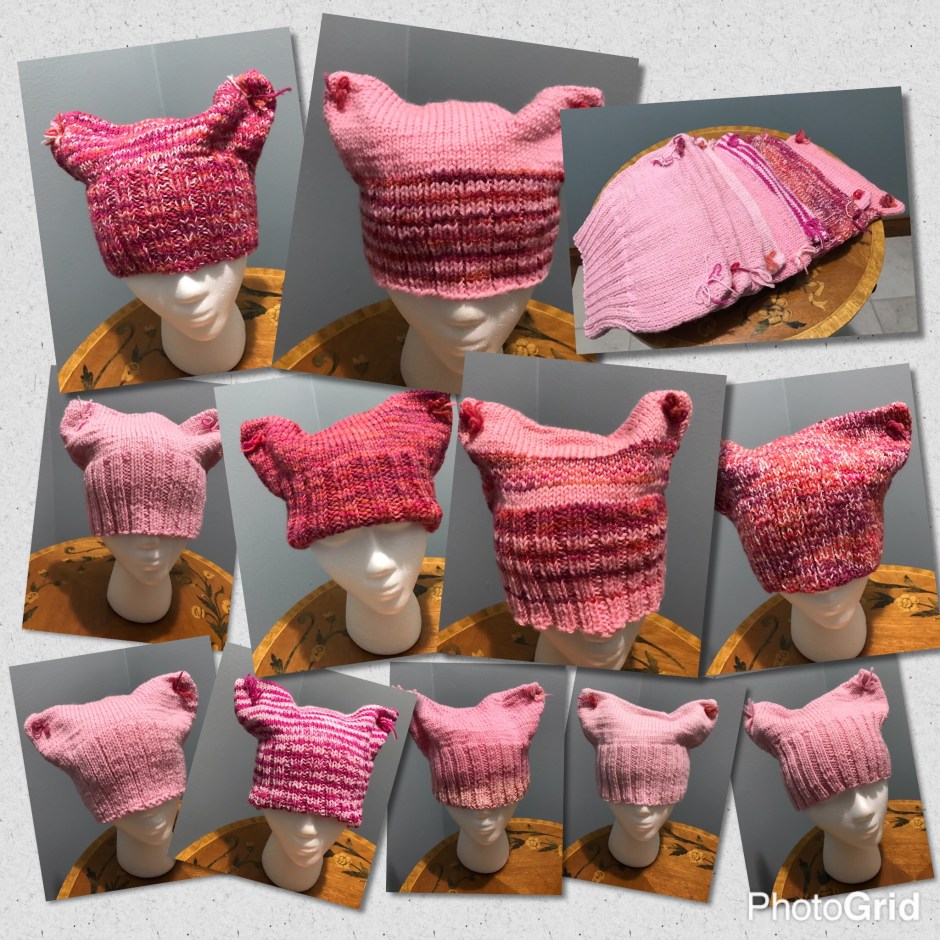
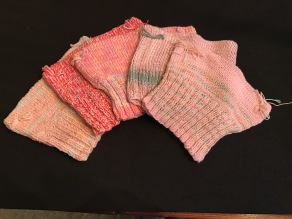 Edited January 12 to add hats made for sister marches.


 but even those who had never been to this retreat did not feel like strangers for long. After the business of checking in, it was not long before people laid claim to their bit of space and settled into spots to begin knitting. Conversations started up quietly among neighboring knitters, tentatively beginning with the simplest of starters such as, “Where are you from?” “What are you working on?” “What yarn is that?” Beginning as a low hum, it was not long before the room was awash in animated conversations combined with laughter, climbing to a pleasant rumble of happy voices.


 specifications for needle size. The more relaxed and rhythmic continental style is much looser, typically I need to go down at least 2 needle sizes to get gauge. For stranded knitting, my gauge is very tight and switching from a single color knit with one hand to a band of stranded color work knit with both hands requires going up a needle size or two as well as really concentrating on keeping my tension loose.


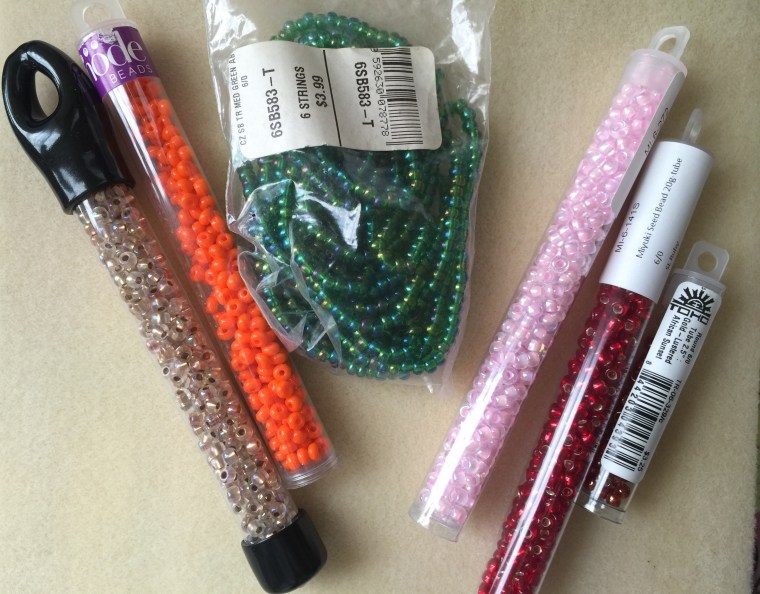
 the user, and I sought to resolve the issue by ordering hooks in various different brands and sizes. In the meantime, a YouTube search showed me the error of my ways with the SuperFloss and, lo and behold, if I used the correct end the floss method actually worked just fine with no damage to the yarn. Possibly I was just as mistaken about the Fleegle Beader as I was with the SuperFloss, I ordered one of those as well. What I did not realize then, but know now, is the hole size can vary greatly from one brand of beads to the next, and even from one bead to the next within a brand or within a single tube. It is not just having tools that brings success, it is all about learning how to use tools correctly and understanding the materials I am working with. My take on all of these tools is summed up in
  approaches, until I found something that worked fairly comfortable with the larger 1.30 size. All was going swimmingly until I switched from Miyuki beads to Toho beads and found that the holes in the Toho beads were somewhat smaller and somewhat less regular. At first I thought I had mistakingly grabbed Toho 8/0 beads instead of 6/0, but no, they were the same 6/0 size as the Miyuki. In spite of having worked out a method for consistently placing beads without damaging the yarn with the Miyuki’s, I was back to square one with the Toho beads.


 there is no right or wrong choice. In my case, I have used the crochet hook when there are not too many beads or I want to pick up the pace. I prefer the SuperFloss when I have fussy or fine yarn, and I certainly prefer it when I am traveling or visiting someone. For mobile knitting, all I need to do is bring a pre-threaded strand of floss along with me and can leave all the other tools behind. The Fleegle Beader and I are still learning to get along, but I definitely see how this would be the method of choice for many given that the beads conveniently stored on the shaft. Let me put it this way, I really, really want to like it and have not given up on our relationship yet.