Updated Bling: Revisiting the Fleegle Beader

Having a strong preference for one approach over another may have just as much to do with what one knows and is comfortable with as with which is actually the better approach.

A few years ago I took a my first introduction to knitting with beads class. We tried three different methods for placing beads: a crochet hook, a Fleegle Beader, and SuperFloss. I was not an instant success. Straight out of the gate I shredded the heck out of my yarn with the Fleegle Beader, accidentally used the floppy end instead of the stiff end on the SuperFloss, and eventually, after much struggle, managed some success with the crochet hook. At the end of the class I was firmly in the crochet hook camp.

Back in the real world, facing my first project with beads, I found out the hard way that a crochet hook can do some yarn shredding too. That led to blaming the tool, not img_6493-1the user, and I sought to resolve the issue by ordering hooks in various different brands and sizes. In the meantime, a YouTube search showed me the error of my ways with the SuperFloss and, lo and behold, if I used the correct end the floss method actually worked just fine with no damage to the yarn. Possibly I was just as mistaken about the Fleegle Beader as I was with the SuperFloss, I ordered one of those as well.  What I did not realize then, but know now, is the hole size can vary greatly from one brand of beads to the next, and even from one bead to the next within a brand or within a single tube. It is not just having tools that brings success, it is all about learning how to use tools correctly and understanding the materials I am working with. My take on all of these tools is summed up in Placing Beads in Knitting. So many people swear by the Beader I thought it deserved to be taken for another spin. After all, everything feels awkward at first…

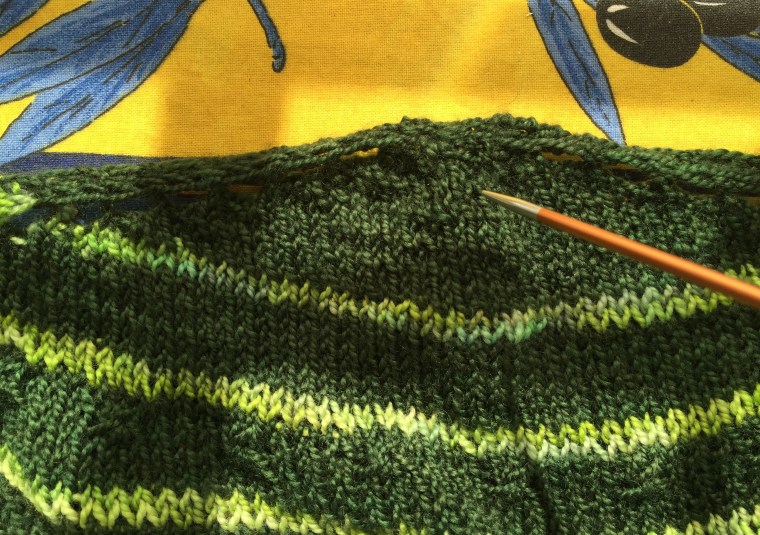
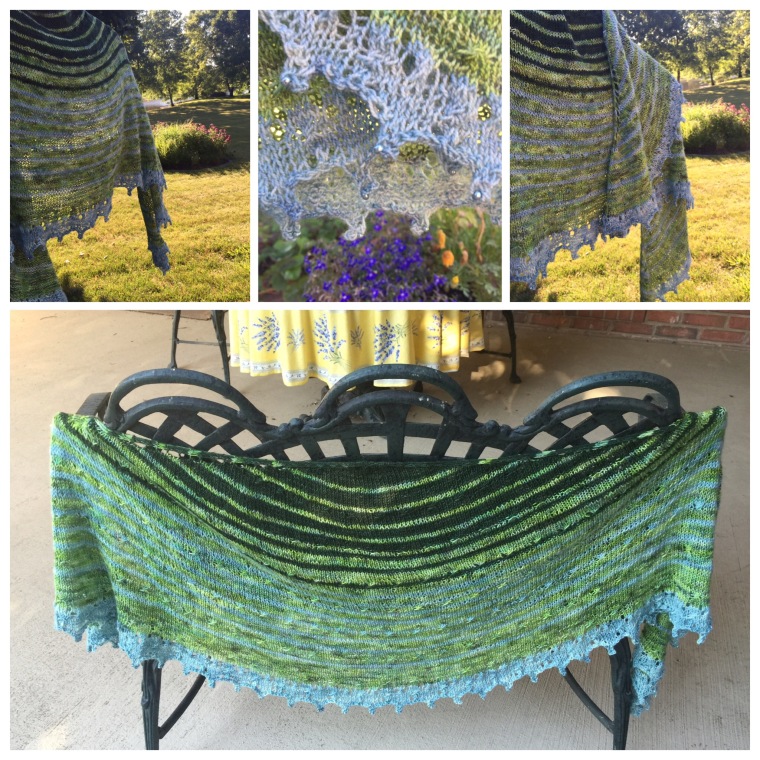
Being the proud owner of 2 sizes of Fleegle Beaders–and facing a large number of bead placements on the Amulet Shawl by Helen Stewart–I decided to give the Fleegle Beader a second chance. It was slow going at first, playing with different angles and imageapproaches, until I found something that worked fairly comfortable with the larger 1.30 size. All was going swimmingly until I switched from Miyuki beads to Toho beads and found that the holes in the Toho beads were somewhat smaller and somewhat less regular. At first I thought I had mistakingly grabbed Toho 8/0 beads instead of 6/0, but no, they were the same 6/0 size as the Miyuki. In spite of having worked out a method for consistently placing beads without damaging the yarn with the Miyuki’s, I was back to square one with the Toho beads.

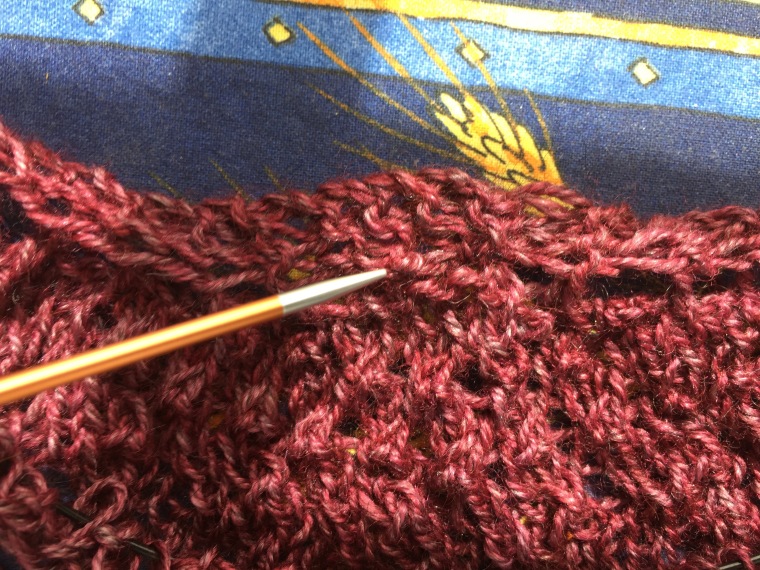
A few tight beads and shredded stitches later, I switched down to the smaller 1.0 size and that helped a bit. Unfortunately some of the beads were still too tight; they would fit onto the shaft but were too small to accommodate the shaft of the Beader plus the strands of yarn. I played around with different methods again and, although I had to toss a few beads aside that were too tight, I did come up with a method that worked pretty well. It goes as follows:

  • Carefully draw the stitch from the LH needle with the hook on the Fleegle Beader
  • Position the groove of the Beader facing up
  • Position the stitch in front of (not on) the sharp tip of the hook
  • Pinch the yarn tightly below the Beader and pull it down so it is taut
  • Push the bead up the shaft, over the yarn, and off the end of the Beader
  • Drop the bead down onto the remainder of the stitch held below the Beader
  • Return the stitch to the LH needle
  • Knit the stitch above the bead unless instructed otherwise
  • Note: stitch is worked from the LH needle if the bead is placed before doing the stitch, from the RH needle if placing bead after doing the stitch
  • A demonstration of this method is on the video An Accidentally Discovered Method for Using the Fleegle Beader

Pinching and tightening the stitch makes the yarn taught and compact, allowing more wiggle room for the bead to slide off the Beader and onto the stitch. I was able to hold it in my hand while I knit, saving me the extra hand motions of putting it down and picking it up, but there was one problem. With the cap off the top of the Beader, I had to be careful to not inadvertently push the beads off the Beader. Stopping to pick up beads was not an added efficiency.

After a fair amount of practice, I can understand why Fleegle Beaders are so popular with some knitters. With beads stored on the shaft, it really was the fastest method for placing beads of all the methods I tried. Overcoming my reluctance to revisit it was worthwhile, eventually I did find a method that works fairly well for me. Going forward I will use the Fleegle Beader when I have projects with lots and lots of beads. For mobile projects, I will still stick with the more portable SuperFloss method on the road for carrying and placing beads on the road. For projects with just a few beads here and there, I will probably just use the simple and easy crochet hook method.

In the end I am glad I kept an open mind and gave the Fleegle Beader a second chance. It will be another useful tool in my bag of tricks.


An aside: Using a thin wire shaped like a V was discussed in the Amulet Shawl KAL thread and I did give it a try. For those who do not have the tools, it is worth trying, but I do think the tools I have work better for me. As with anything, it is all a matter of personal preference. It is certainly easier on the pocketbook.

Advertisement

On Edge

When one first learns to cook recipes are followed to the letter. With a little more experience–and hopefully a bit more skill–a cook adds a bit less salt, substitutes this herb for that, begins to pinch, pour, and dash without the use of measuring implements, and dares to improvise. Recipes are a starting point; a source for ideas and guidance. Often times I find myself looking at several recipes and cooking a dish using a combination of them, taking the best from each.

A knitting pattern is a recipe. It can be followed exactly or it can be a starting point; a pattern written by a trusted designer is always an excellent starting point. No doubt when designing for others an effort is made to make things as simple to do, easy to follow, and uncomplicated as possible. But sometimes simplicity comes at a cost, a more difficult and complicated approach may be the preferred approach. Or sometimes a pattern is a perfect match for what a knitter has in mind except for one or two details. There are just times when I want to trust my instincts, jump off the path, and travel in my own direction.

Helen Stewart is one of my favorite designers for straight-forward, easy to knit patterns that yield beautiful results. I am currently knitting one of her golden oldies, the Pebble Beach Shawl, for a summer knitting challenge after having just finished the Talisman, the first shawl from her Shawl Society series. The two shawls are very similar in set-up and construction. The Talisman starts with a backwards loop cast on and the Pebble Beach with a simple cast on at the top edge but otherwise are essentially the same. I had followed the instructions as written for the Talisman and was uncomfortable the entire time I was knitting it; the top seemed too tight, bunched up, and puckered.

img_6399
Top Edge of Talisman Before Blocking

At the time I kept thinking, “I should have done a garter tab.” I also was concerned with the tightness of the edge, usually something I do not have trouble with. A friend reminded me of a trick she had learned on the Melanie Berg On the Spice Market Shawl: for adding ease to an edge, add a yarn over on the right side and drop the yarn over on the wrong side. After being reminded, I began doing the extra yarn overs on each right side edge and within a row or two it was if the tense work exhaled, stretched, yawned, and relaxed for a nap. Although the miracle of blocking can fix a lot of ills, I was concerned the entire time that I was knitting that blocking magic would not be enough. In the end–although the top edge where there were no added yarn overs looks thin and tight–the Talisman came out okay. But just okay, it does not look as smooth at the top as a garter tab edge would have.

img_6468
Top Edge of Talisman After Blocking

Like a cook who wants less salt but more spice, I added to suit my own taste. Of course I cannot speak for all designers, but I have asked some designers if they minded knitters making modifications and all have graciously said they do not mind at all. Perhaps they are curious to see how their original vision evolves when knitters deviate from their basic recipes. Different fibers, weights, and colors alone can make a difference, but when hundreds of knitters get creative–adding their own pinch of seasonings–it results in some interesting and even inspiring variations on a theme.

The Dreaded Garter Tab

For those of you who have not done a garter tab, the instructions seem outright bizarre and make no sense until you have done it a few times. It is just one of those things in knitting where, by following the instructions line-by-line, it just works. Trust to the force. Basically all one is doing with a garter tab is creating the first few stitches in the top border of the shawl, a little rectangular starting point. It is worth the effort, a garter tab creates the foundation for a smooth edge.

A garter tab starts with casting on the number of stitches that will be on the shawl edge. The cast on can be a garden-variety cast on, such as a long tail, or it can be a provisional cast on. Knit garter rows until there are the same number of garter ridges as cast on stitches, stitches will be picked up using the purl bumps from those garter ridges. Stitches are also picked up from the cast on edge. Picking up stitches using a provisional cast on is somewhat neater but picking up from a regular cast on works too, the difference is not too noticeable. Knit all the picked up stitches and, presto change-o, a garter tab is formed.

Hints. I like to start a garter tab with DPNs so I do not have to wrestle with a dangling cord while fiddling with such a tiny construction. For a provisional cast on, I like to use a crochet cast on with a contrasting yarn, adding several extra chains with a long loop through the last chain to remember which end to unravel. Obviously a tightly twisted yarn in a contrasting color is better than a soft fuzzy yarn in a similar color for a provisional cast on, but I tend to grab whatever is available without much concern over matching the weight and fiber content. When picking up stitches from garter rows, be careful to not pick up the the purl bump immediately below the needle as that will distort the stitch that is on the needle. I learned an easy way to pick up stitches on a garter tab in a Stephen West class and made a video so I would not forget his pearls of wisdom.

Substituting a Garter Tab in the Pebble Beach and Talisman

A basic formula for a garter tab is, cast on the same number of stitches as a the border (I use a provisional cast on, but it is a matter of preference), knit enough rows to form the same number of garter ridges as the border, turn and pick up that number of stitches, and finally turn, pick up, and knit the stitches from the cast on edge. There will be 3 times as many stitches on the needle as stitches on the border.

The Pebble Beach and the Talisman have a 3 stitch border. For the Pebble Beach I substituted the pattern instructions for the set-up with a garter tab by doing the following:

Reminder: my video for Stephen West’s easy way to pick up stitches in a garter tab shows a simple way to pick up stitches in a garter tab.

  • Cast on 3 stitches (optional: use provisional cast on). Knit until there are 3 garter ridges (about 7 rows). Turn and pick up 3 stitches from purl bumps on the garter ridges, knit picked up stitches, turn and pick up 3 stitches from border, knit picked up stitches. (9 stitches)
  • Row 1 (WS): K3, YO, K3, YO, K3 (11 stitches)
  • Skip Rows 1-4 of pattern instructions
  • Start pattern with Row 5 (RS)

I did not do a garter tab in Talisman, nor did I swatch and test it, but substituting these instructions for Rows 1-4 and starting the pattern with Row 5 should work in the same way as it did with the Pebble Beach. I did swatch and test the garter tab for setting up the medium size Pebble Beach. Although it is still a work in progress and has not been washed and blocked, I am much happier with the top edge on the modified Pebble Beach than I was with the Talisman.

img_6470
Garter Tab on Pebble Beach

Up Tight and On Edge

Modifications for creating a more relaxed edge are simple and are the same for both shawls; it really made the difference between having a puckered and tight edge and having a smooth and relaxed edge. Blocking the top edge of the Talisman was a chore but was much easier when I reached the part where I had added the modifications for the ease. Modifications are as follows:

  • RS Rows: K3, YO, KYOK . . . [row instructions as written] . . . KYOK, YO, K3
  • WS: K2, P1, Drop YO, YO . . . [row instructions as written] . . . Drop YO, YO, P1, K2


img_6472
A Looser Edge with Added YOs

It is a bit cludgey on the wrong side as you are dropping a YO immediately before adding a YO, but both YOs are necessary. The dropped YO is what gives the row ease and the added YO is what is used for the foundation of the K-YO-K increases on the right side rows. I also found that the first YO on the WS was obvious to see and drop, but with the distortion from the K-YO-K from the row below, the final YO to drop was a bit harder to see. It was a matter of remembering to always drop a YO before adding a YO on the WS and, like with any pattern, after I had done it row after row after row it became automatic. Just remember, at the start of the row to drop the 4th stitch (the YO from the previous row) and add a new YO and, at the other end, to drop the 4th stitch (YO) from the end and add a new YO before the final 3 stitches.

In the Books and in the Works
The Pebble Beach is still on the needles but already I can see a smooth top and a more open and relaxed edge. The Talisman came out well enough, but were I to do it again I would definitely start with the garter tab and add the modification to ease the edges. A tasty enough dish, but it needed a dash of salt and a pinch of spice to taste.

img_0602-1
A Dash of Salt and a Pinch of Spice Shy of Perfection