Like stars in the still and quiet sky, bright sparkly beads sprinkle a bit of bling across soft fibery textures. Adding a bit of glimmer and glam to knitting is fun, and not nearly so difficult as it looks. Of course, feel free to tell whomever asks that it was really, really hard and they should be in awe of both you and your finished project.
Videos associated with this post: Placing Beads on Knitting Part I and Placing Beads on Knitting Part II.
Knitting With Beads
There are two basic approaches for knitting with beads. One is to pre-string the beads: all the beads are placed on the yarn before knitting with beads begins. The beads ride on the yarn and can be moved into place either on or between stitches. The big “Ugh!”is that if you do not count and add enough beads in advance, you will need to break the yarn to add more beads. Although I mention it here, I will not be covering knitting with pre-strung beads in this post. There are a lot of interesting and creative things that can be done with pre-strung beads so it can be worthwhile to learn more about it.
The second and more commonly used approach–and the one I will be discussing in this post–is placing beads: each bead is individually placed on a stitch as indicated in the pattern. The pattern will tell you whether to place the bead before or after knitting the stitch, usually it is before knitting the stitch. If it is not specified, I knit the stitch after the bead has been placed.
More often than not the pattern instruction will be “PB” for “place bead” which means, place a bead on the upcoming stitch and knit it after the bead has been placed. In this case–after executing the “PB” instruction–the bead rests between the stitch from the row below and the newly knit stitch on the current row. If the instruction is to knit the stitch before placing the bead, the bead rests above the stitch on the current row and is not locked in until it is worked on the subsequent row. I think the bead is more firmly held in place between the two stitches when it is placed after knitting the stitch on the current row and locked in place on the next row. Either way the bead is between two stitches; one above it and one below it. The difference is, place bead then knit puts the bead between the stitch from the row below and the current row while the knit then place bead puts the the bead between the stitch on the current row and the stitch on the subsequent row. Picture an hourglass figure with a tight belt, that is the yarn with a placed bead on it pinching the yarn between the stitch below and the stitch above.
For placing the beads, there are a few different methods including a small crochet hook, a Fleegle Beader, or SuperFloss. Each method is described below, but first there are a few things to know about beads and some materials that are helpful for knitting with beads.
Materials for Knitting with Beads
See the Placing Beads on Knitting Part I video for more about materials and preparing to knit with beads.
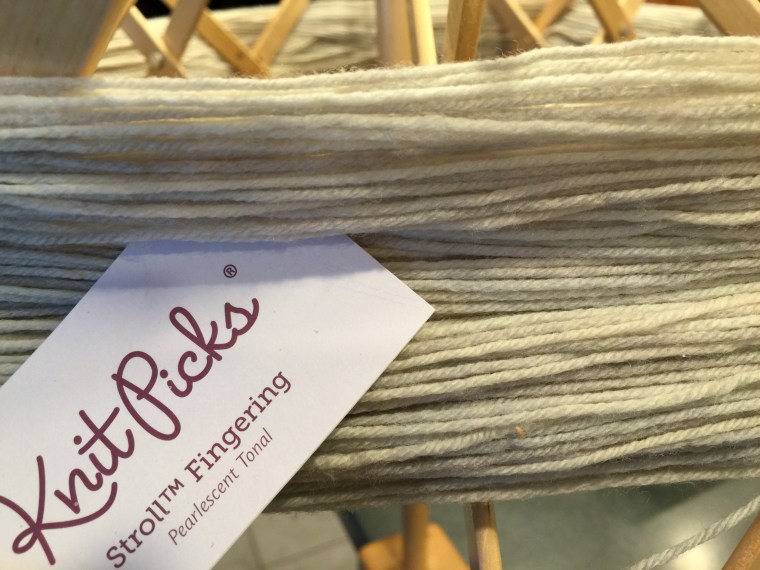
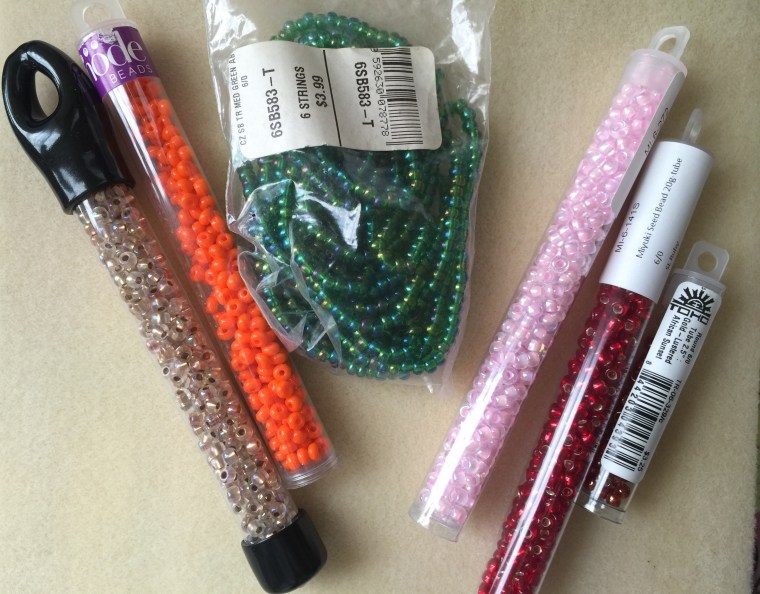
I like to use 6/0 size beads for fingering weight yarn as well as for a heavy lace or light sport weight. For a finer lace, I like to use 8/0 beads. The bead should have a large enough hole to slip onto the yarn, remembering that when placing a bead on a stitch that there are two strands of yarn being fed through the hole. I have used many types of beads and have found that Miyaki and Toho beads have been very consistent in their hole sizes. I have used some beautiful Czech glass beads that had some inconsistencies in the sizes, some were more of a struggle to place than others.
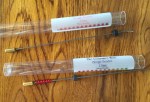
It is useful to have a beading board to hold the beads and tools. A tray will also work,but if using a tray it is helpful to have a foam or soft cloth to help keep the beads from escaping. The sound of tiny beads clattering in the vacuum is not my favorite tune.


Beads are picked up one at a time with a crochet hook but are preloaded onto a Fleegle Beader. There is a bent end on the Fleegle Beader for picking up beads individually or they can be loaded by using a bead spinner. I am not very successful with my bead spinner, it will probably end up on the Freebie table at the next knitting retreat, but some people really like using a bead spinner to speed up the task. Beads can be picked up one-by-one with the stiff end of the SuperFloss or strung onto the SuperFloss using a Dental floss threader. I use a clip on the long smooth end of the floss to hold the beads in place, but the end can be knotted or something can be tied to the end to keep the beads from falling off.
See “Tools of the Trade” at the end of this post for a list of materials.

Methods for Placing Beads
See the Placing Beads on Knitting Part II video for demonstrations and more about methods for placing beads.
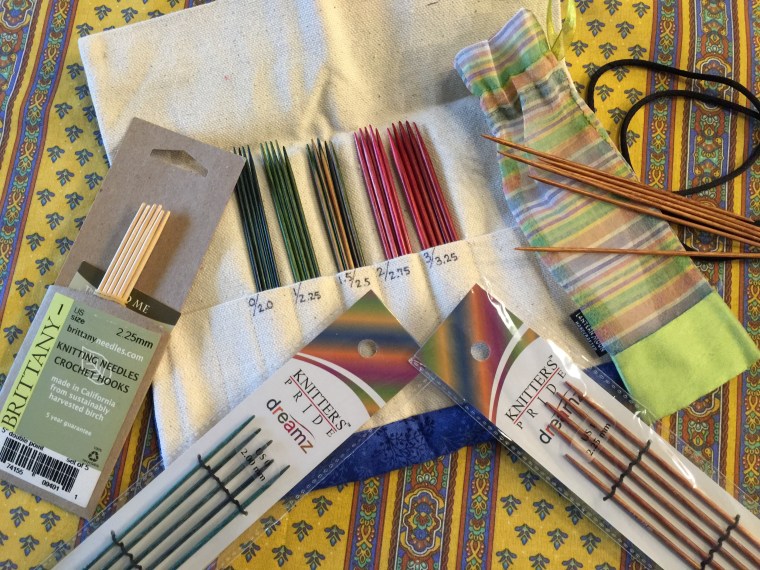
For the crochet hook method, you need a very fine hook that is small enough to insert into the bead; a much smaller size hook than you would use if you were crocheting with the yarn. I like to use the largest size possible. Size 4 (1.25 mm) works for most 6/0 beads, Size 2 (1.5 mm) worked for Miyaki and Toho but not for my Czech glass beads, and Size 0 (1.75 mm) was too large for all my beads. Another option is a Fleegle Beader that has a little sharp hook on one end. The original Beader was 1.0 mm and they later added a 1.3 mm, which is bit better for fingering weight yarns. Both of these options require care, the fine hooks can shred the yarn when placing the bead, but it can be faster than the dental floss method.

The dental floss method allows you to string a lot of the beads on the floss and have them at the ready, but it can be a bit slower and fiddly. On the plus side, it is the most gentle way to put the beads on the work. I have never had yarn shred with this method, unlike with a crochet hook or Fleegle beader. All of these work for placing a bead on the yarn, but each has its pros and cons.
Whichever method you choose, the “PB” (place bead) instruction is executed in basically the same way. Place the bead on the stitch on the LH needle, remove the stitch to place the bead, slide the bead down to expose the loop, and return the stitch to the LH needle. Knit the stitch. Beaded stitch is now on the RH needle with a stitch below it and a stitch above it locking it into place. If you are knitting a pattern with instructions for placing beads but are opting not to use beads, treat a “PB” instruction as a “K1”.
If instructed to knit first then place the bead, knit the next stitch on the LH needle, place the bead on the stitch on the RH needle (I slip the knit stitch back to the LH needle purl wise to add the bead on that needle just because I am more accustomed to beading that way), remove the stitch to place the bead, slide the bead down to expose the loop, and return the stitch to the RH needle. Beaded stitch is now on the RH needle with a stitch below it but will not have a stitch above it locking it into place until the next row is worked.
All of these methods work for placing a bead on the yarn, but each has its pros and cons.
Fleegle Beader
- Quick to use
- Stores beads on shaft
- Sharp edge can shred yarn
- Hint: Push bead onto yarn, do not pull yarn through bead
Crochet Hook
- Quick to use
- Fine head is smaller than yarn, can shred the yarn
- Can be somewhat gentler than the Fleegle Beader
- Does not store beads, beads have to be picked up one at a time
- Hint: Push bead onto yarn, do not pull yarn through bead
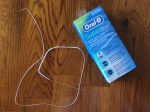
SuperFloss
- Best for travel/mobile knitting
- Works well with uneven hole sizes in beads
- Gentlest for delicate yarn, does not shred yarn
- Beads are stored on the floss
- Can be fiddly and slow but fewer problems with escaping beads and damaged yarn
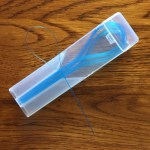
- Has 3 sections with different purposes: a long thin section (holds beads), fuzzy section (holds bead to be worked), short stiff section (used to place bead onto stitch)
- Can use a dental floss threader to add several beads at once to the floss
- Needs to be secured at the end of the thin section: use a clip, tie on a stitch marker, or tie secure knot to keep beads from sliding off the end
Each method has its cheerleaders but the correct method to use is the one that is the most comfortable and convenient; in the end a placed bead looks like a placed bead so  there is no right or wrong choice. In my case, I have used the crochet hook when there are not too many beads or I want to pick up the pace. I prefer the SuperFloss when I have fussy or fine yarn, and I certainly prefer it when I am traveling or visiting someone. For mobile knitting, all I need to do is bring a pre-threaded strand of floss along with me and can leave all the other tools behind. The Fleegle Beader and I are still learning to get along, but I definitely see how this would be the method of choice for many given that the beads conveniently stored on the shaft. Let me put it this way, I really, really want to like it and have not given up on our relationship yet.
See Placing Beads on Knitting Part I and Part II for more information and demonstrations.
Resources
See “Tools of the Trade” below for a list of materials mentioned in this post. Materials can be purchased from online merchants as well as from specialty shops, big box stores, and local yarn shops. I found my Fleegle Beaders on Etsy and Miss Babs. Miyuki and Toho beads are sometimes sold at yarn shops, there are many excellent online bead shops although I have mostly purchased them through Amazon partners and Loopy Ewe. If you know of a good online resource for beads, feel free to leave a comment.
Tools of the Trade
- Beads (Miyaki and Toho consistent brands, many other nice options available in stores and online) Size 6/0 for heavy lace, fingering, and light sport weights or size 8/0 for lace and light fingering
- Beading board or foam/soft fabric square on tray for containing beads and tools
- Dental Floss Threader (GUM, other brands available) for threading beads onto SuperFloss or yarn if doing pre-strung beading
- Super Floss (Oral B, other brands available) for holding and placing beads
- Wonder Clips (Clover, other brands available) for holding beads in place on SuperFloss
- Fleegle Beader for holding or placing beads. Available in the original 1.0 mm or 1.3 mm, which is better for fingering
- Small Crochet hook for placing beads: Size 8 (.90 mm) works for 6/0 and 8/0 beads, Size 4 (1.25 mm) works for most 6/0 beads, Size 2 (1.5 mm) worked for Miyaki but not for my Czech glass beads, and Size 0 (1.75 mm) was too large for all my beads


 pattern and an assignment to knit a swatch from the pattern. While we did so, he gave us tips, helped individuals, and answered questions. Not only did he answer questions about the task at hand and knitting in general but he also answered many questions about his designs and his design process. I got the impression that his design process is more often–although not exclusively–the result of hands-on experimentation rather than intellectual forethought and envisioning.


 My favorite stage of a project is always when it is the images in my mind, imagining the what-can-be before the reality of the what-have-I-done hits followed by the inevitable coulda-shoulda-woulda regrets. For this yarn I pictured a cozy shawl in the warm colors, something to comfortingly wrap around my shoulders. Picking a pattern was a challenge in winnowing down the thousands of options; even limiting Ravelry searches to shawl, 450-600 yards range, fingering weight, and “in my favorites” resulted in pages and pages of options. I narrowed it down to shawls with texture, avoiding the lacy and delicate options as that did fit with the theme as I envisioned it. The candidates were Swan Lake by Penny Schumers, Cerasifera by Kirsten Kapur, Enticing by Jennifer Weissman, and Nutmeg by Ágnes Kutas-Keresztes. And, as things like this usually happen, I later stumbled across Issa by Katie White, a fairly simple shawl with loads of texture in a center panel. It also looked very easy to modify.
 cake–whereas mini-skeins are more like stripes or swaths of color. Mini-skeins are more flexible in how the colors are mixed and ordered. Among the many options, one could do narrow stripes alternating the colors, narrow stripes of multi-colors within a main color, or wide swaths of non-repeating colors. What I decided to do was a mirror effect, so that with 5 colors I do color 1, 2, 3, 4, 5 then 5, 4, 3, 2, 1 ending with the same color I had started with. The first thing that might occur to the reader is that many mini-skein color changes means many not-so-mini ends to weave in. I was very skeptical at first, but the magic cake used in the Magic Cake Ruffle Shawl by Paula Emons-Fuessle opened up my eyes to new possibilities for joining pieces of yarn together without the chaos of spaghetti hanging off the back of the work. Her “magic cake” is made by joining multiple pieces of yarn into a single cake using a magic knot to attach them. Jane Richmond made a nice You-Tube video showing the magic knot: